28.2.12

Nails of the Week- Incoco Femme Fatale

If you have been following my blog, you will know how much I love Incoco nail appliques. So much so that I wrote my first blog post about them, read it here if you missed it the first time around.

This week I am sporting Femme Fatale which, as you can see below, is a funky gold animal print


I really can't rave on about this product enough ( in case you hadn't noticed!!) It has to be the ultimate mummy product. I swear this manicure took me no longer than 10 mins, with a pause for a nappy change in between!!!

Here are some more photos in natural light and in artificial light. I wish that Incoco was more readily available in the UK! Next ebay haul, I will definitely be ordering some of their colour manicures.


25.2.12

Saturday Sparkles

I realise that sparkles aren't everyone's tasse de the, but I happen to love 'em!!!! I decided that my ipad cover needed to be a little more interesting and picked up this cupcake sticker at a local boutique. If you happen to like sparkles too, then you can buy similar stickers here!!  I'm also hoping that it puts off Mr Jones from stealing my ipad to read rugby blogs..........


That same boutique also happened to have a sale on. I saw these Maloles Silvia platform pumps on sale for two thirds of their original price, it would have been rude not to treat myself!!!!!
I haven't been able to wear heels for a long time and these are the first pair I have bought in about a year so I'm just a teensy bit excited, can you tell??!!!


24.2.12

MUA Professional Eye Palette- Heaven & Earth

I have always been a bit of a make-up snob, Chanel and Mac are my faves! But there has been so much buzz on the blogs about MUA's eye palettes that I just couldn't ignore. At just £3 for twelve shades- Ideal for maternity leave budget-  it just seemed rude not to give them a go!!


The colour range is great for either a natural or a smokey eye look. I would have liked a couple of matt shades in there, but with so many shades to choose from, I really can't complain. They staying power is pretty good too. I have also tried layering mine on top of a nude cream shadow used as a primer ( Mac Paint Pot- Painterly) and it really doesn't budge, looking perfect until I take it off at night! No creases! Nothing!!!


Here's the link if you like these shadows-  Link!  At £3 what's not to like :)

I love picking up new products on beauty blogs such as Lisa Eldridge and Pixiewoo. They are fast replacing the beauty pages in glossy magazines for me! Magazines are almost out of date by the time they reach the shelves and beauty editors often have incentives to promote certain products so you don't always get an honest review.

Do you have any beauty blogs you would recommend??


22.2.12

Bloom vs Stokke

Pre baby, my style decisions were based around Loubies v Choos- at least in my dreams they were...

Now I'm thinking more along the lines of errrr Bloom v Stokke

Yep, we're high chair shopping!

We've put it off for quite a while and have been feeding Little E in her Baby Snug- Mamas & Papas version of the Bumbo Seat ( which incidentally has been amazing). But right now we're mid stand off, with Mr Jones championing the Stokke Tripp Trapp and Mrs Jones in the Bloom Fresco corner.

I fell in love with the futuristic design Bloom high chair, waaayyyy before Estella was born, without a thought for practicality. The base of the chair is pretty big and friends who have bought the Bloom tell us that it is difficult to clean.

The Stokke is petite in comparison and it could easily be confused for part of the furniture. We love all the Stokke products that we have already bought and the Tripp Trapp comes with nothing but rave reviews. So in Theory, Mr Jones's team wins..... yet part of me still loves the less practical option.

I guess life hasn't changed that much after all!!!!!

Which one would you choose?

Little E testing out the Bloom Fresco at Itsu


Test driving cousin Meli's Trip Trap

21.2.12

How to Remove Gel Nail Polish

Pretty much as soon as I uploaded my blog post on DIY Gel Manicures the other day, I realised that I hadn't actually mentioned how to remove soak off gels. Six months later and I am still suffering from baby brain!!!!
Well, I don't usually get the 2 weeks wear out of my gel manicure as promised by the salons and I do confess to peeling my polish off occasionally, but please don't try this because it takes a layer of nail off with it. My gel manicure usually lasts around a week before a few pop off, although this is a vast improvement on the standard 48 hours I get with a regular manicure. Even if the gel polish does last longer, then usually the nail regrowth at the bottom, will make me want to soak the polish off and start afresh.
To do this, all I use is ;
  • Some household acetone ( nail polish remover isn't usually strong enough) you can get this from pharmacies for about £1.
  • Aluminium foil torn in to 10 strips of of about 10cm x 3cm
  • 10 cotton wool balls
  • An orange stick/ cuticle stick

    Then, all I do is soak the cotton wool in acetone and place it over the nail, wrap the aluminium foil around the finger and sort of squish it together at the ends to keep it in place, repeat this for each finger and then leave on for about 15mins.
    After the time has elapsed, the polish should be almost brittle and I can usually remove it quite easily with a cuticle stick. If I find that it isn't coming off easily then i usually reapply the acetone soaked cotton wool and leave it on a little longer.
    The foil wraps should look something like the picture below. Yep- very attractive!!!:
    
    Even if you aren't confident enough to do your own gel manicure, you could still get it applied at a salon and then remove it yourself afterwards using this method. It's much cheaper this way, plus it saves you going back to the salon if you aren't going to have another manicure straight away.

19.2.12

Mam Perfect Soother- with steriliser box!!

Chez Jones, we love Mam products, especially their soothers and self- sterilising bottles! I noticed this new Mam soother in Mothercare and thought the sterilising box sounded like a great idea. I have been caught out a few times without a spare and combined with a frustrated baby, it wasn't a pretty sight. The other great thing about the sterilising box- and this also applies to their self sterilising bottles- is that if you go away, you don't have to lug around a steriliser or microwave bags!!
That said, I do think that £5.75 is a lot to pay for one soother so really you are paying for the sterilising box . I had a hunt around online and found that boots also do a steriliser box for soothers that costs just £1.30!!! This would also be useful if you baby prefers another brand.
However, the pastel shade of the 'Perfect' soother is super cute. Also the design makes the soother look quite subtle- unlike some that look like garish bath plugs!!!

18.2.12

How to do a DIY gel manicure

Regular manicures only ever last a few days on me, so gel manicures such as Shellac and Gelish have been an absolute godsend. Whilst I realise that strictly speaking, gel manicures are supposed to be professional treatments, it's pretty much impossible to get to a salon when you have a baby! Last Sunday's salon manicure was a rarity, thanks to the Rugby!!! Besides, I have pretty much kept the local nail salons in business over the years, so I don't feel to guilty about giving it a go myself.

I already had a UV Lamp from a previous failed attempt at acrylics but you can find decent 36W lamps on ebay for about £15 such as this one here.


Once again, I headed over to ebay for some Gelish top and base coat, and decided on Orly GelFX in Red Flare for my colour.


 Here's my method:

  • Prep your nails with a dry manicure, the polish will adhere better to the nail if it isn't soft from water. Making sure that your cuticles are well pushed back.
  • Wipe your nails with some polish remover or alcohol to remove any dirt.
  • Apply a layer of base coat and cure for around 1 minute ( some brands vary but check on the back of the bottle and it should tell you).
  • Make sure not to get any polish on your skin or cuticles, it will cause the gel to lift.
  • Apply two coats of gel colour, curing in between.
  • Finally apply and cure the top coat, making sure to cap the edges to help the polish last longer.
  • The polish may still feel a bit sticky, don't worry it should be dry, this is just an inhibition layer which you can remove with some acetone free polish remover.
Final Result


I really think that the nail companies are missing out by reserving this for the professional use only. It isn't a complicated treatment, you just need to be able to paint your own nails. One company has already cottoned on to this gap in the market, Red Carpet Manicure sell the entire kit, and have a vast array of colours.

OPI have also just released their own professional gel polish called Gelcolor, I am eagerly awaiting my order of Malaga Wine ( from ebay again) which I can't wait to try out. I promise to post pictures!

14.2.12

Matt Lipstick for Valentines Day


I am loving the current trend for matt lipstick, especially because of the long wear factor, which makes them perfect for people on the go. I am able put my lipstick on in the morning and run out of the house in the afternoon, still looking vaguely human.
They are super versatile, Becca beach tints are specifically designed to be used on the cheeks as well as lips and I have also worn Collection 2000 Fairy Cake as a blush on my cheeks. For a softer look on your lips, apply a coat of sheer lipgloss or lipbalm over the top.

Happy Valentines Day xxxx

13.2.12

Beaba Babycook review

Firstly, I must confess that I am quite possibly the world's worst cook and yet, strangely, I thought that it would be a great idea to cook home made puree's for my daughter so that I could at least see what was going in to her food. Well, I have been using the Beaba Babycook for about a  week now and so far I have avoided giving her food poisoning and, surprisingly, she even seems to like it!!!


The Beaba Babycook is a nifty little gadget that steams, purees, reheats and even defrosts the baby food for you. All you have to do is add the required amount of water to the well on the left hand side depending on what you want to do. Put the chopped up food in the jug part and then press go!! 15mins later it's all ready.


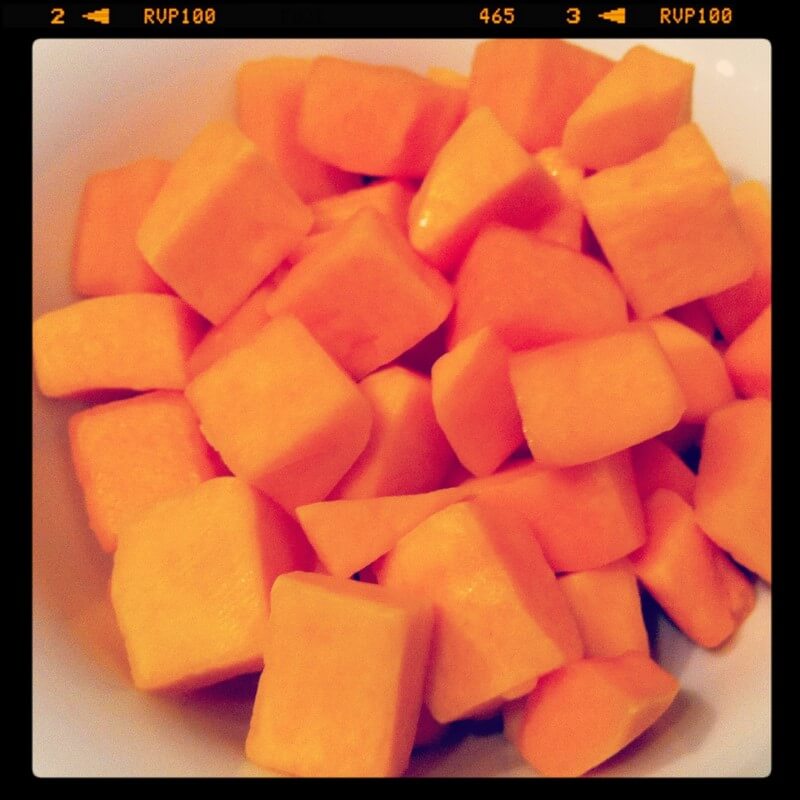
Shhhhhhh, don't tell anyone, but I cheated!!! I bought pre-chopped butternut squash from M&S ( only because last time I almost cut my finger off cutting a butternut squash, honestly!!).


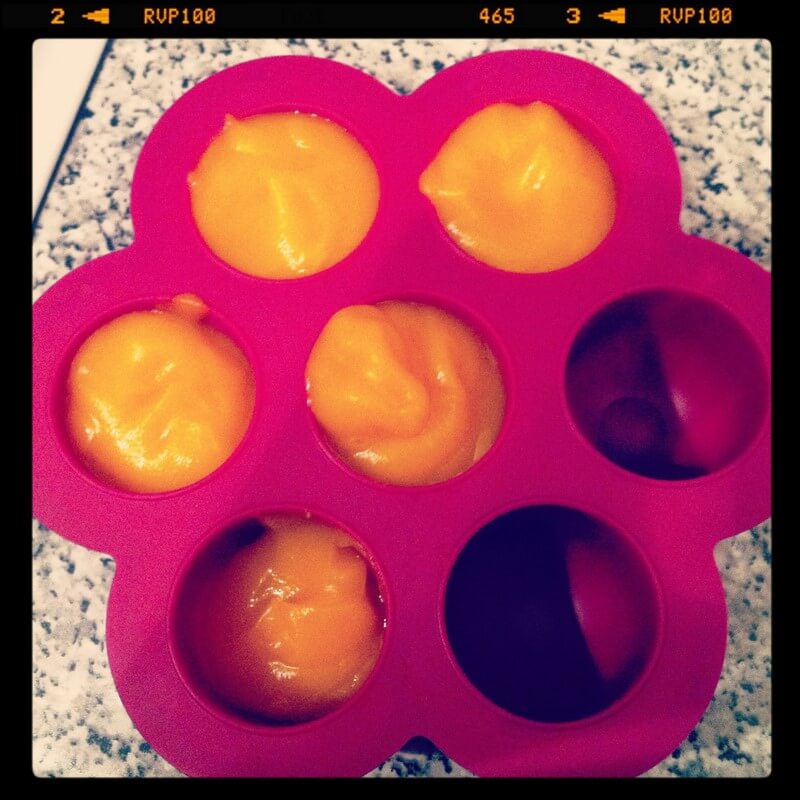
Usually there's enough made for a few portions, which can then be frozen in a silicone tray like the one above which is also made by Beaba.
When you're ready to serve the frozen portions up, you can put the cubes back in to the Beaba to defrost. But, this is the cheeky part: It's almost impossible to find any containers small enough to fit in to the jug section, so you are pretty much forced to fork out more money for the Beaba Portion food containers. I really think that these should actually be sold with the Babycook as you are pretty much stuck without them.
Other than that, I think this is a great little purchase, it's a super quick way to prepare healthy foods for your baby. It's pretty small and doesn't take up much room in the kitchen, you can even buy a travel bag so that you can still cook up a storm when you're away. But truthfully, who wants to cook whilst on holiday?? I think we would manage fine with a few packets from Ella's Kitchen.
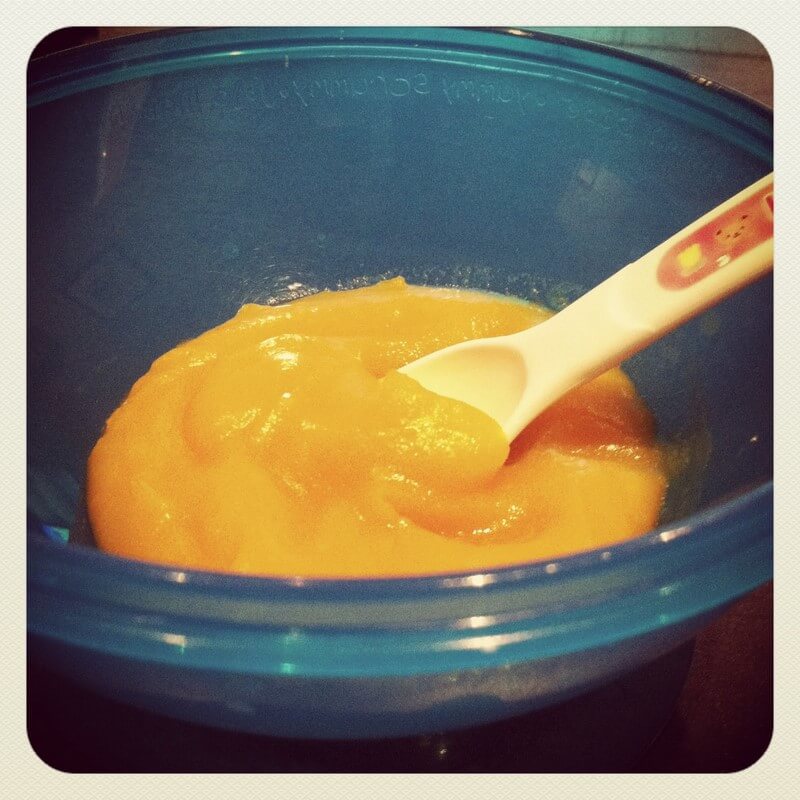
Anyway here's the final result, my home made mush, which I am incredibly proud of :)


And the all important happy, but messy, customer!!


12.2.12

Sunday Teal

This afternoon, my living room was full of guys shouting at the rugby and babies bizarrely glued to the green screen. So, I thought I would take advantage of  the unwitting baby sitters and sneak out to treat myself to my first salon manicure since little E was born. I headed over to the newly opened BS nail spa on Sloane Avenue for an hours escape. I seriously wish the salon could have opened last summer when I could barely touch my toes thanks to my humongous bump! For today's manicure I chose Orly's Sapphire Silk, a beautiful teal creme.

Thankfully the red team won and I came home to a happy Mr Jones!!


10.2.12

A Beautiful Christening

Last weekend, my gorgeous niece who is just a few weeks older than Estella, was christened at a church in Marylebone. Family flew in from all over the world for her big day and the snow even made an appearance, just to add a little atmosphere to the occasion. The service was followed by a reception at My Hotel here in Chelsea which is a cute little boutique style hotel.

My sister did a wonderful job of decorating the room with vintage style floral bunting personalised with my niece's name. Everyone adored the scrumptious vanilla sponge christening cake made by The Hummingbird Bakery.


Aga of Aga designs (who is a super talent in designing and creating jewellery and party decorations) had the very important role of godmother and also helped decorate the room, having created absolutely stunning monogrammed bonboniers and even a wish book which carried on the pink star theme that my sister had chosen.


Above are the hand made bonbonieres filled with sugared almonds. These are a tradition carried over from our Greek side of the family.


Delicious macaroons and afternoon tea.

9.2.12

Babyliss Big Hair Styler Review


I have the most frizzy, thick and coarse nightmare hair known to man and I have been using hair straighteners for many many years to tame my locks. But as wonderful as straightners are, my hair always looks flat and they do seriously damage your hair. I had read lots of rave reviews for the Babyliss Big Hair Styler and I wasn't sure that it would work on my very difficult hair. I have amassed a huge number of points on my boots advantage card ( mainly due to all the baby products we buy there) so I decided to treat myself to the Babyliss Big Hair styler.

It did take me a few goes to get the technique right and in the end I searched for tutorials on youtube and found this really helpful video below. You need to rough dry your hair until it's about 75% dry then section your hair and use the Big Hair Styler to create volume and to smooth your hair. This device basically combines using a round brush and a heavy hair dryer making it so much easier to style your hair yourself, especially at the back, which I always find awkward. If you aren't able to make it to the salon for regular blowdries then this would be a pretty good substitute. I have never had so many compliments about my hair, and I've even been stopped in the street to ask where I get my hair blowdried!!! Big Hair Styler, I love you!!!

© Mrs Jones London . Design by Fearne.